
Nail trims have a bad reputation, mostly because of how people usually go about them rather than the task itself. Most cats aren’t actually upset about the trim itself, they’re upset because someone nervous is holding them awkwardly.
This guide covers how to cut your cat’s nails at home safely, calmly, and without turning it into a fight neither of you wins.
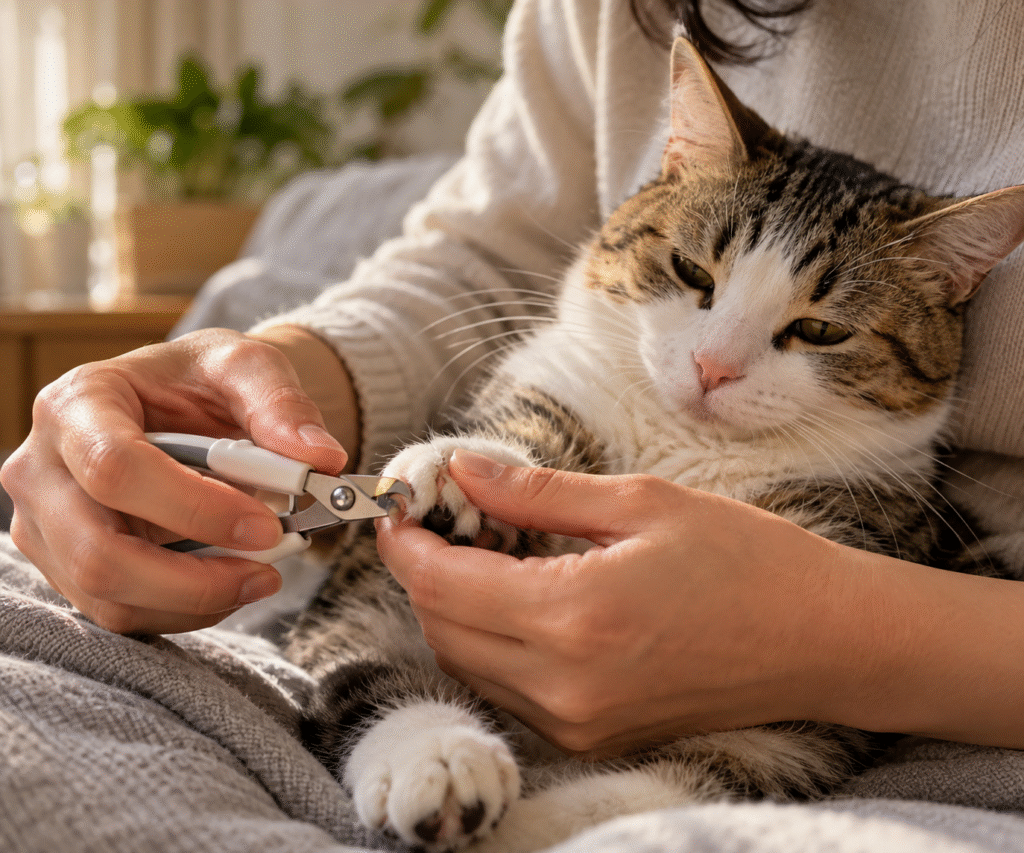
A calm cat having a nail gently trimmed by a relaxed, confident owner.
Why Regular Nail Trims Matter
Overgrown claws don’t just look bad, they can curl back into the paw pad and cause real pain, especially in older or less active cats who don’t scratch as much to wear them down naturally. Left unchecked for long enough, an ingrown claw can lead to infection and a genuinely painful vet visit that regular trimming would have prevented entirely.
Trimmed nails also mean less damage to your furniture and fewer accidental scratches during play, which makes the whole household calmer, cat included.
A Quick Note on Declawing
Regular trimming is the humane, correct way to manage a cat’s claws. Declawing is a different thing entirely, it’s a surgical procedure that removes part of the toe bone, and it’s illegal in the UK under the Animal Welfare Act except for genuine medical reasons. If you’ve ever wondered whether declawing is an option here, it isn’t, and it shouldn’t be. Regular trims at home cover everything a responsible owner actually needs.
What You’ll Need
A proper pair of cat-specific nail clippers makes this far easier than trying to use human nail clippers or scissors, which crush rather than cleanly cut a cat’s claw.
Keep styptic powder nearby too, just in case. You probably won’t need it, but having it ready means one small mistake doesn’t turn into a stressful trip to stop the bleeding.
A few treats within reach round things out. Rewarding your cat during and after the trim, not just at the very end, helps them build a genuinely positive association with the whole process rather than just tolerating it.
Step 1: Get Your Cat Comfortable With Handling First
Before you even pick up the clippers, spend a few days just handling your cat’s paws during normal calm moments, a cuddle on the sofa, for example. Gently press each paw so the claws extend, then let go and reward them.
This matters even more with a nervous or rescue cat, who may need extra time before they trust you touching their paws at all. Our guide on settling in a rescue cat covers more on building that kind of trust from the ground up.
Step 2: Find the Right Position
Most cats do best held gently in your lap, facing away from you, with their back resting against your chest. This keeps their paws easily accessible without you needing to pin them down.
If your cat squirms, don’t tighten your grip further, that usually makes things worse. Take a short break and try again once they’ve settled.
Step 3: Know Where to Cut
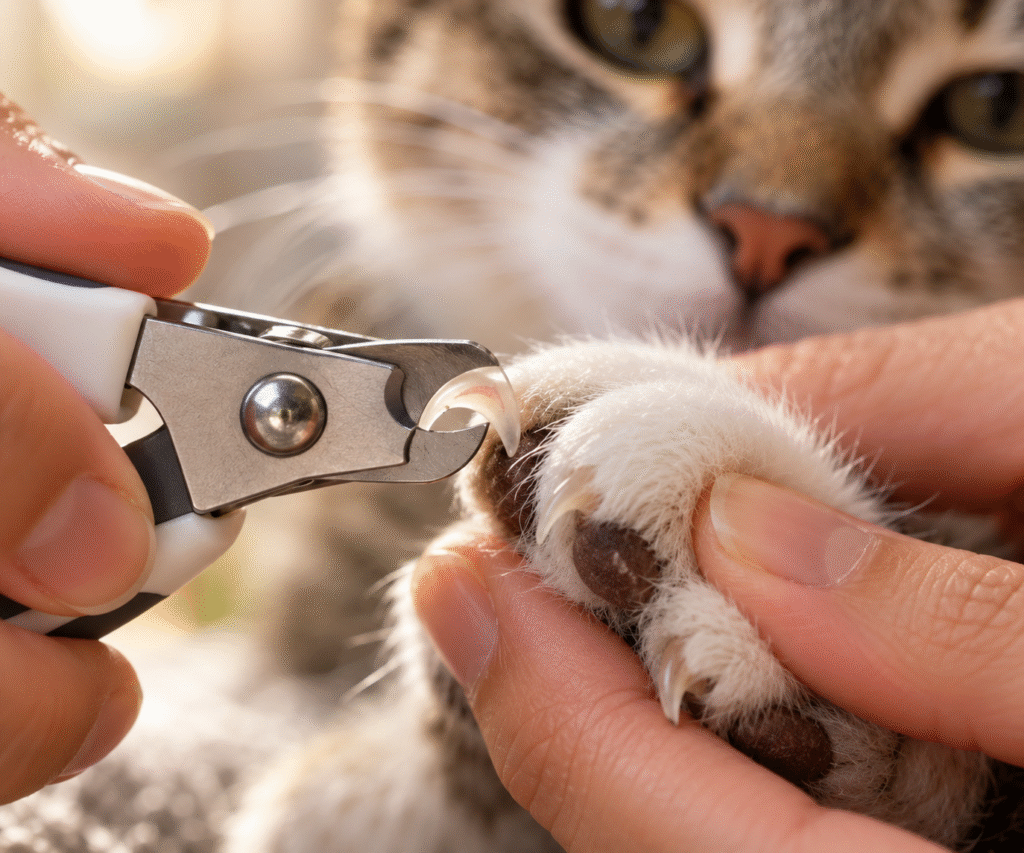
Look closely at the claw before cutting. You’ll see a pink area inside called the quick, which contains blood vessels and nerves. Cutting into it hurts and bleeds, so the goal is always to trim well clear of it, taking off just the sharp, curved tip.
On cats with dark claws where the quick isn’t visible, trim conservatively, a small amount at a time, rather than guessing.
Step 4: Trim Calmly, One Paw at a Time
Gently press the paw to extend a claw, snip the tip cleanly in one motion, and move to the next. If your cat gets tense or tries to pull away, stop there for the day rather than pushing through all four paws in one go.
Getting through two or three claws calmly beats forcing all eighteen and ending the session on a bad note. A regular grooming routine helps here too, cats who are already used to being handled during brushing tend to tolerate nail trims far better.
What If You Cut the Quick?
It happens, even to experienced owners. If it does, apply styptic powder directly to the tip and hold gentle pressure for about thirty seconds. It’ll look more dramatic than it actually is, and most cats recover from the moment faster than their owner does.
Take it as a sign to go slower and trim a little less next time, not a reason to stop trimming altogether.
How Often Should You Trim?
Most indoor cats need a trim every two to three weeks. Outdoor or more active cats who scratch trees and rough surfaces regularly may need it less often, since natural wear does some of the work for you.
When to Let a Professional Handle It
If your cat becomes genuinely aggressive during nail trims, or you simply can’t get comfortable doing it yourself, a vet or professional groomer can handle it quickly and safely. There’s no shame in outsourcing this one, plenty of owners do.
iCatCare has helpful guidance on cat nail care if you want more detail beyond this guide.
Final Thoughts
Nail trims get easier every time you do them, for both of you. Go slow, keep sessions short, and don’t aim for perfection on the first try. A calm, gradual approach beats a rushed one every single time, and most cats end up tolerating, sometimes even enjoying, the routine once it becomes familiar.
If you’ve been putting this off out of nerves, start smaller than you think you need to. Even trimming a single claw counts as progress on day one. The habit builds faster than most owners expect, and within a few sessions, what once felt like a battle usually turns into just another quiet part of caring for your cat.